Installing recessed lights can transform any room, providing clean, modern illumination that enhances your home's ambiance and value. While this electrical project might seem daunting, understanding the process helps you make informed decisions about your lighting upgrades.
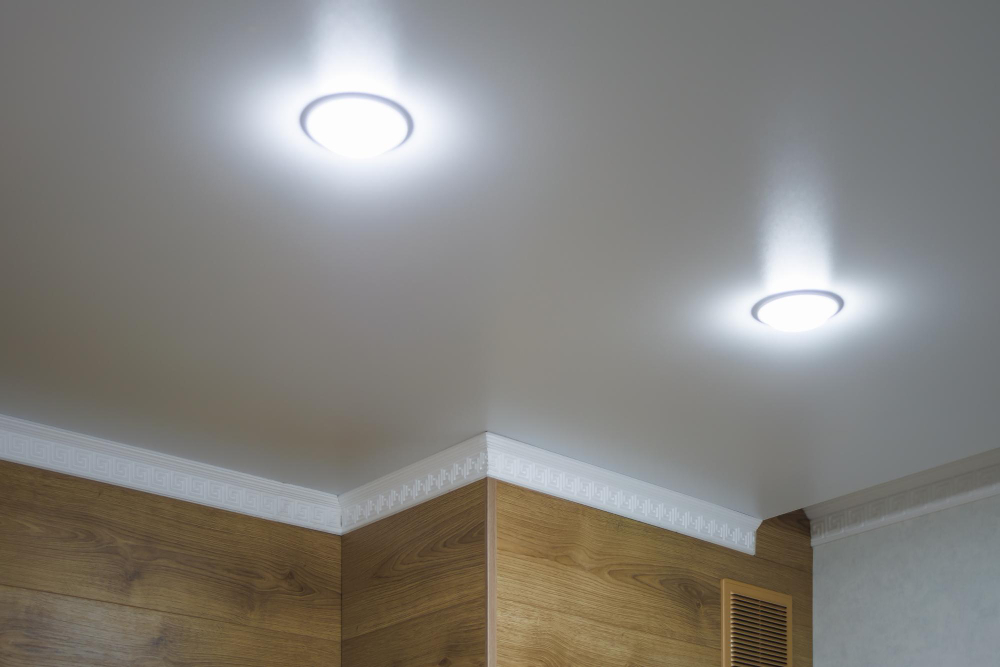
Recessed lighting offers numerous advantages over traditional fixtures. These sleek lights sit flush with your ceiling, creating a streamlined appearance that works with any decor style. They provide excellent task lighting for kitchens, ambient lighting for living rooms, and focused illumination for workspaces.
Before diving into installation, it's crucial to understand that electrical work involves safety considerations and local building codes. Many homeowners choose to work with professional electrical contractors to ensure proper installation and compliance with regulations.
Planning Your Recessed Lighting Layout
Proper planning determines the success of your recessed lighting project. Start by measuring your room and determining how many fixtures you'll need. A general rule suggests spacing recessed lights approximately 4-6 feet apart, though this varies based on ceiling height and desired brightness levels.
Consider the room's function when planning placement. Kitchen task areas benefit from closer spacing, while bedrooms might require fewer fixtures for comfortable ambient lighting. Mark potential locations on your ceiling with painter's tape to visualize the layout before committing to cuts.
Check your ceiling construction before proceeding. Older homes might have plaster ceilings or unusual joist spacing that complicates installation. Use a stud finder to locate ceiling joists and ensure adequate clearance above the ceiling for your chosen fixtures.
Essential Tools and Materials
Successful recessed light installation requires specific tools and materials. You'll need a drywall saw or hole saw attachment for your drill, wire strippers, electrical tape, and a voltage tester for safety. Don't forget wire nuts for connections and a headlamp for working in dim ceiling spaces.
Choose appropriate recessed light fixtures for your space. IC-rated fixtures work safely in direct contact with insulation, while non-IC fixtures require clearance. LED fixtures offer energy efficiency and long lifespan, making them increasingly popular choices.
Ensure your electrical circuit can handle additional fixtures. Each recessed light typically draws 65-75 watts for incandescent bulbs or 8-15 watts for LED versions. Calculate total wattage to avoid overloading circuits, which could require upgrading your electrical panel.
Safety Considerations and Code Requirements
Electrical safety should be your top priority throughout this project. Always turn off power at the circuit breaker before beginning work, and use a voltage tester to confirm electricity is off. Working with live wires poses serious injury risks and potential fire hazards.
Local building codes often require permits for new electrical installations. Contact your local building department to understand requirements in your area. Some jurisdictions require licensed electrical contractors to perform certain types of electrical work, particularly new circuit installations.
Consider hiring professionals for complex installations. If your project involves running new circuits, working with aluminum wiring, or navigating challenging ceiling construction, experienced electrical contractors ensure safe, code-compliant installation.
Step-by-Step Installation Process
Begin installation by marking fixture locations according to your planned layout. Use a template provided with your fixtures or create one using cardboard. Double-check measurements before cutting to avoid costly mistakes.
Cut ceiling holes using a drywall saw or hole saw. Work slowly to maintain clean edges, and be prepared for falling debris. Remove insulation carefully if present, noting its original position for replacement after installation.
Run electrical cable between fixtures and to your switch location. This step often requires working in tight attic or ceiling spaces. New construction wire (Romex) typically works for residential installations, but consult local codes for specific requirements.
Connect fixtures according to manufacturer instructions. Most recessed lights use standard wire connections: black to black (hot), white to white (neutral), and bare copper to green (ground). Secure connections with appropriate wire nuts and test each fixture before closing up ceiling holes.
Troubleshooting Common Installation Issues
Encountering obstacles during installation is normal, particularly in older homes. Ceiling joists might interfere with planned fixture locations, requiring slight adjustments to your layout. Flexible planning prevents major setbacks during installation.
Insufficient ceiling clearance poses another common challenge. Some recessed fixtures require 6-8 inches of clearance above the ceiling. Shallow ceiling spaces might necessitate low-profile fixtures specifically designed for tight installations.
Wiring complications can arise when connecting multiple fixtures. Understanding basic electrical principles helps, but complex wiring scenarios often benefit from professional assistance. Incorrect connections can cause fixtures to malfunction or create safety hazards.
When to Call Professional Electrical Contractors
Certain situations definitely warrant professional electrical contractors. If your project requires new circuit breakers, service panel modifications, or complex wiring runs, experienced electricians ensure safe, efficient completion.
Consider professional installation for valuable homes where mistakes could prove costly. Electrical contractors carry insurance and warranties that protect your investment. They also understand local codes and permit requirements thoroughly.
Time constraints might make professional installation worthwhile. Experienced electrical contractors complete installations efficiently, minimizing disruption to your household routine. They also have specialized tools that simplify challenging installations.
Maintenance and Long-Term Considerations
Properly installed recessed lights require minimal maintenance. LED fixtures last 15-25 years under normal use, while traditional incandescent bulbs need replacement every 1-2 years. Choose quality fixtures to maximize longevity and performance.
Regular cleaning maintains optimal light output. Dust accumulation on bulbs and reflectors reduces brightness over time. Turn off power before cleaning and allow fixtures to cool completely after use.
Consider smart lighting controls for enhanced functionality. Dimmer switches allow brightness adjustment for different activities, while smart switches enable remote control and scheduling. These upgrades often require compatible fixtures and proper wiring.
Enhancing Your Home's Value and Functionality
Professional-quality recessed lighting installation enhances your home's market value and daily functionality. Well-planned lighting creates attractive ambiance that appeals to potential buyers while improving your family's living experience.
Energy-efficient LED recessed lights reduce electricity costs significantly compared to traditional alternatives. Calculate potential savings over fixture lifespans to understand long-term financial benefits of quality installations.
Making the Right Choice for Your Home
Recessed lighting installation combines technical skill with careful planning. While motivated homeowners can complete simple installations, complex projects often benefit from professional expertise.
If you're looking for trusted electrical contractors in Apopka, FL, contact Spectrum Electric Inc today to schedule an appointment. Professional installation ensures safety, code compliance, and optimal performance for your lighting investment.